1
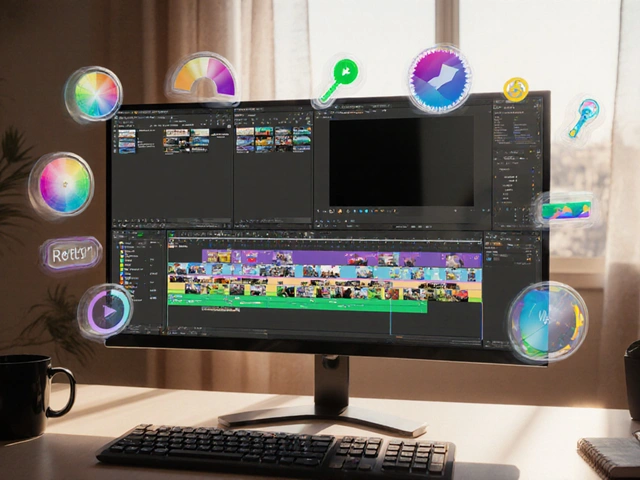
Mastering Video Editing Effects: A Practical Guide for Creators
Video Effect Selector
Select project type and desired outcome, then click "Find Recommended Effects" to get tailored recommendations.
Popular Effect Categories
Transitions
Seamlessly connect scenes with cuts, fades, wipes, and 3D flips.
EssentialColor Grading
Set mood and visual consistency with LUTs and color wheels.
Visual ImpactMotion Graphics
Dynamic titles, lower thirds, and infographic elements.
InformationSpeed Manipulation
Slow-motion, fast-forward, and speed-ramping for emphasis.
TimingChroma Key
Replace backgrounds with virtual sets or graphics.
BackgroundsStabilization
Smooth out camera shake and lens distortion.
StabilityQuick Overview
- Understand the main families of video editing effects and when to use each.
- Learn step‑by‑step how to add effects in Adobe Premiere Pro, DaVinci Resolve, and free tools.
- Follow proven tips to keep your edits sharp, not cluttered.
- Spot common mistakes-like color banding and shaky footage-and fix them fast.
- Grab a ready‑made reference table that matches effect types to typical projects.
If you’ve ever stared at a timeline full of clips and wondered how the pros make their videos pop, this guide is for you. We’ll break down the world of video editing effects into bite‑size chunks, so you can start adding polish without the overwhelm.
What Are Video Editing Effects?
In plain terms, a video editing effect is any visual or auditory modification applied to a clip after it’s been recorded. Effects range from the subtle-like a slight brightness tweak-to the dramatic, such as a full‑screen glitch that rewrites the mood of a scene. They sit on top of the raw footage, letting you shape the story in post‑production.
Core Types of Effects You Should Know
The toolbox of a video editor can feel endless, but most projects rely on a handful of core families. Below each family is introduced with schema markup so search engines can recognize the entity.
Transitions are visual bridges that link one clip to the next. Common styles include cuts, fades, wipes, and 3‑D flips. They help control pacing and signal a change in time or location.
Color Corrections & Grading adjust the hue, saturation, and luminance of footage. Corrections fix exposure errors, while grading adds a consistent mood-think teal‑orange cinematic looks.
Motion Graphics & Text Animations inject dynamic titles, lower thirds, and infographic elements. They often combine shape layers, keyframed motion, and easing curves to feel fluid.
Keyframe Animation lets you control any parameter over time-opacity, position, scale, or effects intensity-by setting points on a timeline.
Speed & Time Manipulation includes slow‑motion, fast‑forward, and speed‑ramping, where the clip accelerates or decelerates mid‑shot for dramatic emphasis.
Chroma Key (Green Screen) replaces a solid‑color background with another image or video, enabling virtual sets, weather maps, or fantasy worlds.
Stabilization & Lens Corrections smooth out camera shake and fix distorted optics (barrel, pincushion) after the fact.
Overlays & Blend Modes layer additional footage or graphics using blending algorithms like screen, multiply, or overlay to create light leaks, particle effects, and texture washes.
How to Apply Effects in Popular Editors
Below is a quick, practical walk‑through for three common editing platforms. The steps assume a fresh project with at least one clip on the timeline.
- Adobe Premiere Pro
- Open the Effects panel (Window→Effects).
- Drag a desired effect-say Cross Dissolve-onto the edit point between two clips.
- Adjust duration by clicking and dragging the edge of the transition on the timeline.
- For keyframe animation, select the clip, open the Effect Controls tab, click the stopwatch next to Opacity, and set values at different timestamps.
- DaVinci Resolve (Free)
- Switch to the Edit page, locate the Effects Library on the left.
- Drop a Fade In or Zoom effect onto your clip.
- Open the Inspector to fine‑tune parameters-speed, position, or color wheels for grading.
- Enable Dynamic Zoom for an automatic pan‑and‑zoom effect without keyframes.
- Shotcut (Open‑Source)
- Load a clip, then click the Filters tab.
- Press the + button and choose a filter like Crop: Scale or Colour Grading.
- Adjust sliders for brightness, contrast, or hue; changes update in real time.
- For a green‑screen key, add the Chroma Key: Simple filter and pick the background color.
Tips for Effective Use
- Start with the story. An effect should reinforce the narrative, not distract from it.
- Keep it subtle. A 2‑second fade feels natural; a 10‑second glitch looks amateur unless the whole video is experimental.
- Use adjustment layers. Apply colour grading or LUTs to a layer above all clips-this ensures consistency and saves time.
- Pre‑render heavy effects. Stabilization, speed‑ramping, and complex motion graphics can slow playback. Render them before final export.
- Match the platform. YouTube audiences prefer quick cuts and bright colours, while corporate presentations benefit from clean transitions and muted palettes.
Common Pitfalls and Quick Fixes
Banding in colour‑graded footage - occurs when the video uses limited colour depth. Fix it by adding a subtle Noise filter or working in a 16‑bit project if your software supports it.
Jitter after stabilization - too aggressive a setting can make frames look warped. Reduce the smoothing strength and enable “Crop Less” to retain more of the original frame.
Audio drift with speed changes - changing speed affects pitch. Use a “Maintain Pitch” or “Time‑Stretch” audio effect to keep voices natural.
Over‑used blend modes - stacking multiple overlays can crush contrast. Lower the overlay’s opacity or switch to a lighter blend mode like Screen.
Effect Type at a Glance
| Effect Family | Primary Goal | Best‑Fit Projects | Common Tools |
|---|---|---|---|
| Transitions | Seamlessly connect scenes | Vlogs, narrative shorts | Cross Dissolve, Wipe, 3‑D Flip |
| Colour Grading | Set mood & visual consistency | Cinematic shorts, documentaries | LUTs, Color Wheels, Curves |
| Motion Graphics | Explain concepts, brand identity | Explainer videos, corporate reels | After Effects, Fusion, built‑in titles |
| Speed Manipulation | Highlight action, compress time | Sports highlights, dramatic reveals | Timewarp, Optical Flow, Retime |
| Chroma Key | Swap backgrounds, create virtual sets | News graphics, fantasy scenes | Keylight, Ultra Key, Simple Key |
| Stabilization | Reduce camera shake | Travel vlogs, DIY footage | Warp Stabilizer, SmoothCam |
| Overlays & Blend Modes | Add texture, light leaks, UI elements | Music videos, teaser trailers | Screen, Multiply, Overlay |
Frequently Asked Questions
What is the difference between a transition and an effect?
A transition is a specific type of effect that bridges two clips, controlling how one ends and the next begins. Other effects-like colour grading or motion graphics-modify a single clip’s look or add visual information without linking two clips together.
Do I need a powerful computer to use effects?
Not always. Simple cuts, fades, and basic colour tweaks run smoothly on modest laptops. Heavy effects like 4‑K optical flow stabilisation or complex 3‑D motion graphics benefit from a stronger GPU and more RAM, but you can always render previews to keep playback fluid.
Can I reuse the same effect settings across multiple projects?
Yes. Most editors let you save presets. In Premiere Pro, right‑click an effect and choose “Save Preset.” In DaVinci Resolve, you can create a Power Grade that stores colour settings, LUTs, and more.
Why does my footage look grainy after applying a LUT?
LUTs manipulate colour data directly. If the source clip is low‑bit or compressed, the LUT can amplify noise. Add a light “Noise Reduction” filter before the LUT, or work with a higher‑quality source file.
Is it okay to combine several blend modes on one layer?
You can, but each additional mode strips more contrast and can make the final image look flat. It’s safer to layer separate clips with individual blend modes, or keep the stack to two layers max for clarity.
Next Steps & Troubleshooting
After you’ve tried the basics, here’s a quick checklist to debug common hiccups:
- Effect not showing? Verify the clip is selected, the effect is enabled, and the timeline zoom shows the effect region.
- Playback choppy? Turn on “Render In/Out” or lower preview resolution to ½ or ¼.
- Colour shift after export? Export using a colour‑managed format (e.g., Rec.709) and avoid transcoding twice.
- Audio out of sync after speed change? Apply the speed change to video only, then use a separate “Time‑Stretch” audio effect set to “Maintain Pitch.”
Now that you know the toolbox, experiment with one effect per project. Build a habit of testing a small change, reviewing the impact, and then moving on. In a few weeks you’ll have a personal library of go‑to effects that make any video look tighter and more professional.