24
Stream Audio Compression: Use Limiters, Gates, and EQ to Get Crystal-Clear Voice
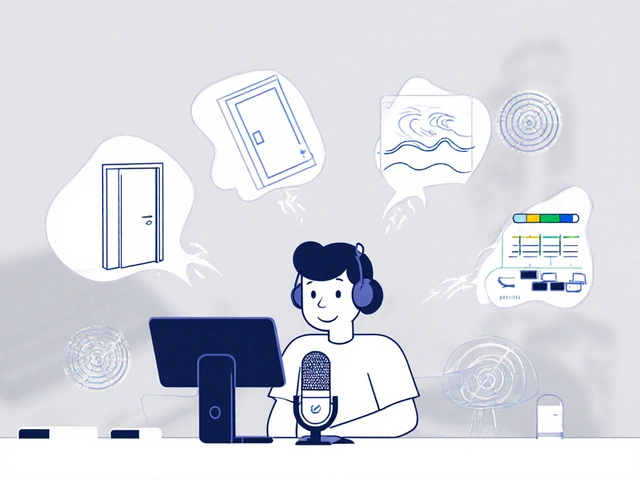
If you’ve ever streamed live and heard your voice crackle, echo, or get buried under keyboard clicks and background hum, you’re not alone. Most streamers focus on video quality and forget that audio compression is what makes listeners stick around. Clear voice isn’t about having the most expensive mic-it’s about how you shape the sound after it’s captured. With simple tools like limiters, noise gates, and EQ, you can turn muddy audio into studio-quality voice that cuts through any background noise.
Why Your Audio Sounds Bad (Even With a Good Mic)
You bought a Shure SM7B or a Rode NT-USB, set it up, and expected magic. But your voice still sounds thin, distant, or gets drowned out by your fan or dog barking. The problem isn’t your gear. It’s uncontrolled dynamics. Live audio has wild swings. One second you’re whispering a story, the next you’re yelling at your teammate. That sudden spike? It distorts. The quiet parts? Listeners turn up their volume, then groan when your keyboard clacks like a drum solo. That’s where compression tools come in. They don’t just make things louder-they make your voice consistent, present, and easy to hear without constant volume adjustments.Noise Gate: Silence the Chaos
A noise gate is your first line of defense. It’s like a door that only opens when you speak. When you’re quiet, it shuts. No more PC fan, AC hum, or neighbor’s lawnmower bleeding into your stream. Set it right, and your audio stays clean. Set it wrong, and your voice gets chopped off at the start or end of sentences. How to set a noise gate for voice:- Start with the threshold at -40 dB. Play back your stream audio and listen for when the gate kicks in.
- Lower it slowly until background noise disappears, but your voice still triggers it cleanly.
- Set attack to 1-5 ms-fast enough to catch your voice instantly.
- Release should be 100-300 ms. Too fast? Your voice cuts off. Too slow? You hear the gate open after you stop talking.
Compressor and Limiter: Stop Peaks, Keep Volume Even
A compressor reduces loud parts and boosts quiet ones. A limiter is a compressor with a very high ratio-think of it as a ceiling that stops anything from going over. For streaming, you don’t want peaks hitting 0 dB. That causes distortion. You also don’t want your voice to drop below -24 dB, or listeners will strain to hear you. Settings that work for voice streaming:- Threshold: -18 dB
- Ratio: 3:1 to 4:1
- Attack: 10-20 ms
- Release: 100-200 ms
- Makeup gain: +4 to +6 dB
EQ: Shape Your Voice So It Cuts Through
EQ doesn’t just boost or cut-it gives your voice character. Most streaming mics pick up too much low-end rumble and too much harsh midrange. Here’s what to do:- High-pass filter at 80 Hz: Removes rumble from your desk, chair, or HVAC. Your voice doesn’t need frequencies below this.
- Cut 200-400 Hz by 2-4 dB: That’s the muddy zone. This makes your voice less boxy and more open.
- Boost 3-5 kHz by 2-3 dB: This is where speech intelligibility lives. Your “t,” “k,” and “p” sounds get clearer here.
- Cut 8-10 kHz if your voice sounds sharp or sibilant: Use a de-esser or gentle cut. Too much here makes your voice sound like a cartoon character.
Chain Order Matters: Gate → Compressor → Limiter → EQ
This isn’t arbitrary. Order changes everything.- Start with the noise gate: If you compress noise first, you’ll amplify it. Clean the signal before you touch dynamics.
- Then compressor: Now your voice is quiet and clean-compress it to even out levels.
- Then limiter: Prevent any leftover peaks from blowing out your stream.
- Finally, EQ: Shape the tone after dynamics are locked in. If you EQ before compression, the compressor will fight your changes.
Real-World Setup: OBS Studio Example
If you’re using OBS, here’s how to set it up in under 5 minutes:- Right-click your microphone in the Audio Mixer → Filters.
- Add a Noise Gate → Set threshold to -35 dB, attack 5 ms, release 200 ms.
- Add a Compressor → Threshold -18 dB, ratio 3.5:1, attack 15 ms, release 150 ms, makeup gain +5 dB.
- Add a Limiter → Ceiling -1 dB.
- Add an EQ → High-pass at 80 Hz, cut 300 Hz by 3 dB, boost 4 kHz by 2.5 dB.
What Not to Do
Don’t stack three compressors. Don’t crank the EQ to +10 dB on everything. Don’t ignore room acoustics. A $200 mic in a bathroom will never sound good, no matter how much you compress. If your room echoes, hang a blanket behind you. Sit closer to the mic-10-15 cm is ideal. Use a pop filter. These aren’t “nice to haves.” They’re part of your audio chain. Also, avoid auto-gain features. They’re convenient, but they react too slowly. You’ll get loud bursts before the software reacts. Manual compression gives you control.Test Your Setup Like a Pro
Before going live, do this:- Record a 30-second sample: Talk, laugh, stand up, walk away, sit back down, cough.
- Play it back on headphones. Is your voice always audible? Is there any distortion?
- Ask a friend to listen and say: “Can you hear every word?”
Final Tip: Don’t Over-Process
It’s easy to go overboard. Too much compression makes your voice sound flat and lifeless. Too much EQ makes it thin or tinny. Your goal isn’t to sound like a radio station. It’s to sound like you-just clearer, more present, and easier to listen to for hours. Start simple. Use one gate, one compressor, one limiter, and one EQ. Master those. Then tweak. The best streamers don’t use fancy plugins-they use basics well.Do I need expensive plugins for clear voice streaming?
No. Free tools like OBS’s built-in filters work perfectly for most streamers. Paid plugins like iZotope Nectar or Waves CLA Vocals offer more control, but they’re overkill if you’re just starting. Learn the fundamentals first-gate, compressor, limiter, EQ-before spending money.
Why does my voice sound robotic after compression?
Robotic sound usually comes from too much compression or too fast attack/release. If your attack is under 5 ms, it can squash the natural transients in your voice-the little pops and breaths that make it human. Try increasing attack to 15-20 ms and lowering the ratio to 2.5:1. Also, check your EQ. Cutting too much midrange can make you sound hollow.
Should I use noise suppression or a noise gate?
Use both, but in order. Noise suppression (like RNNoise) removes constant background noise like hum or hiss. A noise gate cuts out silence between speech. Suppression handles steady noise; the gate handles sudden spikes and gaps. Together, they clean your audio without killing your natural delivery.
My voice cuts out when I pause. How do I fix it?
That’s your noise gate releasing too fast. Increase the release time to 250-400 ms. Also, check your threshold. If it’s set too high, even your quiet breathing triggers the gate to close. Lower the threshold slightly and test with a recording of your normal speaking rhythm.
Can I use these settings for podcasting too?
Yes, absolutely. The same chain works for podcasts. The only difference: you can afford to be a little more dynamic. For podcasts, you might use a slightly lower compression ratio (2:1 to 3:1) and leave more space between words. For live streaming, you need consistency because listeners tune in and out randomly.